Monday, May 14, 2012

The Kids Rooms

Hey everyone! Sorry it's been SO LONG since I last blogged. I started an exercise regime and it's been about two weeks before I had enough strength/ stamina to declutter AND workout. 

Well, I worked on my kids rooms. WHAT A MESS! I enlisted the help of my mom, who very graciously came over to help me. There is nothing wrong to admit that a job is too big for you and you need help. Shoot, the cleaning got done faster and I don't feel fried from being so over whelmed. 

Kids rooms are far different than any other room, because you have to do the whole room instead of little project parts of it, since the kids like to play in there and will just undo everything. Hence the reason why it's a mess in the first place.

Now I forgot to take a picture of my daughters room before I got started,...


But rest assure it pretty well looked like my sons room, but with girly toys.


Dear me. No wonder he cries when I tell him to clean his room....


Well, just as we've been doing for all of the other rooms, we sort the room, throw away trash, and give away as much as we can. My son was at school at the time, so I made executive decisions, just as I did with my daughters room, but there are a few things like the stuffed animals that we will go through together and he'll choose what to keep and what to give away. It's good practice. 


Ta da! When my son came home from school his sister grabbed him by the hand, before he even had a chance to take off his shoes, and lead him to his room. "See! See! It's all clean now!" she cried. It's was so cute. My son said, "Wow mom! It's all clean! I love it!". I said, "New rule in the house is, 'keep it clean'. If you take a toy out, you put it away. All toys, books, and anything else on the floor must be put away before we leave the house or go to bed". He says he's going to keep it clean, so we'll see.


Oh, and here's just a few bags of give away's from his room. His sister had quite a few too. Ah freedom...

So far in my journey to declutter I have found that the less stuff you have the easier it is to clean. Such a simple idea, but yet in a world where everything is now, instant, always available, it's easy to get bombarded with stuff. One of the thoughts that I work against all the time is, "what if I need it later". Again, in this world of now, instant, always available, if for whatever reason I need it again, it will be out there somewhere for me. But obviously if I'm not using it now and don't have any plans on using it in the near future, then I probably don't need it to begin with. It's a challenge. It's tough. It's a totally new way of thinking. A rewiring of the brain perhaps. I think it will come with time.

Until next time!

With Love,
Emily

Monday, April 23, 2012

A Jewelry Idea

So where do you keep your jewelry? Drawer? Tackle box? Over stuffed jewelry box?

I kept mine in a dresser drawer. It was becoming a pain to find the piece that I wanted and trying to keep them all organized and untangled was getting more and more difficult as I added new pieces. I especially wanted to keep the jewelry I made exceptionally safe.

I looked around pinterest and saw several ideas, but I didn't have any one of those things to organize with. Rusty rake anyone? There's an eye poker for ya.

So I had a cork board that wasn't being used, so I hung it up, added my thumb tacks it a pleasing way and arranged my jewelry.


This hangs behind my bedroom door. It's nice to get dressed and then stand there in awe picking out the piece that will be honored by my wearing it.

Oh, and the pins up there are just stuck up there by themselves.

A couple more pieces and I'm going to need another cork board.

With Love,
Emily

No sew slip cover!

My couch. It's made of this easy to clean, looks like "leather", goes with everything, vinyl. With two kids and a husband hanging out on the couch, it was was starting to see it's day... and it's only 3 years old. Sheesh.

One day I was fed up and I was getting tired of vacuuming up those stupid vinyl flakes every day, so I said that there has to be some way to make it look better.

One day it hit me. How about a fitted sheet? 

So I tried it.... and...

No sew slip cover!


This is a queen size fitted bottom sheet from a set I got as a wedding present. It's super soft, and since we got a king size bed 3 years ago, it just sits in the closet waiting for the in laws to visit. Thankfully I also have another set to use when they visit!

Bonus- It prevents you from sticking to the couch in the summer and prevents the couch from feeling ice cold in the winter.

I love free.

With Love,
Emily


Tuesday, April 17, 2012

Soda Box Upgrade

The other day I was trying to find something in my pantry (the deep dark cave of cabinets) and I said to myself in frustration that there HAD to be a better way to organize the stuff I have in there. Well, I found a cheap (and FREE!) way of handling that problem... Soda Boxes!

There will be a nice long posting about how exactly I organized my pantry on a later posting, but today I wanted to share with you how I upgraded the ugly soda boxes for my craft bookcase in the laundry room. I figure those I'm going to see all the time, so I should make them look pretty.


Supplies
Soda box (refrigerator kind) with the top cut off
Scissors
2 pieces of 12x12 scrapbook paper (don't get the thick fancy kind, just the cheap thin kind)
Mod Podge (or make your own like I did with a bottle of white glue and water)


Step 1: Start with folding your paper in half


 Step 2: Cut the fold

 Step 3: Measure

I eyeballed it and pinched the corners so it would line up again without remeasuring.


 Step 4: Get the glue

Again, I make my own mod podge. It's just a bottle of while glue (I even use the cheap kind at that) and enough water to make it look like thick milk.


 Step 5: Glue the box and add paper.

I wasn't too exact, but I did make sure that the pinched corners lined up and the paper lined up with the bottom of the box. No one want to have a wiggly box!


Step 6: Cut the corners

Following the pinch, cut down to the box. Then glue both the box and the paper, and fold down! I also glued over the top of the paper once it was glued down to ensure that it stays down. 


Step 7: Repeat step 1 and 2 with the other piece of paper, and glue down to the side of the box. 
Fold over the top just as we did in Step 6.


Step 8: Glue over the entire box rubbing out any air bubbles. 


Leave to dry and your done! Later you can add a pretty tab labeling whats in the box

I hope you have fun making these pretty boxes!

Until next time!

With love,
Emily

Friday, April 13, 2012

How to make a butterfly feeder!

Hey everyone!

With ~~~~~?---->@ SPRING! @<----?~~~~~ being here we have TONS of butterflies. My daughter and I love to look at them as we wait at the bus stop, but the only thing is those butterflies are just too fast to get a real good close up look.

Well, I remember reading on eHow on how to make a butterfly feeder!


It's very simple really. Here's what I did.

Ingredients

Couple of hand fulls of sugar -about 2-3 tablespoons
Very hot water- about a cup
3 really old, this side of rotting bananas
Shallow dish of some kind- I used an old Tupperware kind of container that the lids never fit on anyway

Assemble

Step 1: Dissolve sugar in the hot water
Step 2: Cut bananas into around 2 inch chunks and place in dish
Step 3: Add sugar water, but make sure the bananas are up out of the water so the butterflies have something to land on!

Now I've heard that adding flowers around the feeder will help attract the butterflies, don't know if that works, but it does make it look pretty. Oh, and change out the bananas when they dry out or get moldy.

I placed my feeder outside of the front windows so my kids (and I) can watch from afar to not disturb the wildlife, but close enough to identify what butterflies we see.

If this works out for us, then we'll be doing this well into October/November, because we have a long butterfly season.


**Edit**
It took a little while for the butterflies to find mine, (I think it was because we had a petered out storm go through), but here they are!


I added an orange, poked at the fruit with a butter knife to loosen up the juices, and it seems to attract more and different kinds of butterflies.


LOVE IT!


I hope you make a butterfly feeder too!

Until next time!

With Love,
Emily

Thursday, April 12, 2012

How to Organize your Christmas Lights!

Hey everyone! While decluttering the stuff from the laundry room I found some Christmas lights that didn't make it back into the Christmas box. Well, I had been kicking myself for not finding this on The Chive sooner, but finding these MIA lights today means I get to try it out!


Step 1: Get a coat hanger.

I found that the kind with the notches in it is PERFECT for slipping the plug onto 
so it's easier to wrap the lights


Step 2: Wrap

I started at one end and worked my way across 
and then tucked in the end back through a previous wrap.


Step 3: Store

You can hang them up some place or put them nice and neat in the ol' Christmas box. You'll thank me this Christmas when you won't have to untangle those beautiful lights!


Have fun!

With Love,
Emily

How to Clean a Microwave

Went to reheat my coffee this morning, and I suddenly realized how nasty the inside of my microwave was!


Ew.

Step 1: Gather your supplies

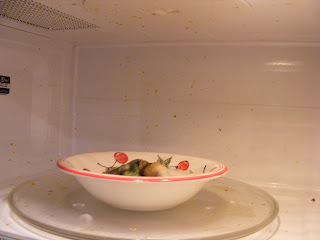
I have a microwave safe bowl with some water in it, a wet wash rag, and lemon juice.


Step 2: Prepare the cocktail

Place the wet rag in the water and put about a tablespoons worth of lemon juice on top.


Step 3: Say goodbye to grime

Place the cocktail in the microwave and nuke it for 3-5 minutes. I did 3 because I know it will loosen up everything in there, but some microwaves are lesser powered than mine and you may have to nuke it for up to 5 minutes. Please keep an eye on it. No one like the smell of a burning rag.


Step 4: Protection!

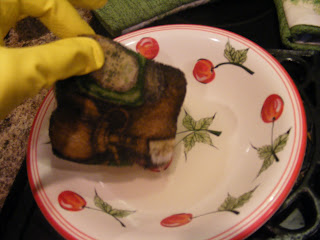
Even though you're going to use oven mitts to get the bowl out of the microwave, that rag is going to be SUPER BURNING HOT!


Step 5: Squeeze

Gingerly squeeze the rag... 


and place it over the bowl. This will help it cool down fast enough so you can handle it.


Step 6: Wipe!

Just wipe until it's all squeeeeeeeky clean! If it doesn't come off easily, just nuke the rag and water again for another couple of minutes. Don't forget the inside of the door! Also, take out the turn table and wash it in the sink with warm soapy water.


Step 7: Be in heaven.

So much nicer! And lemony fresh too!


Enjoy!

With Love,
Emily

Wednesday, April 11, 2012

Part one- Project #3- The Laundry Room Bench

Hi again everyone! This is only part one of the bench, because even though I had high hopes of completing it all today, it didn't happen. And that is life, and if it happens to you, don't let it get you down. There really is a tomorrow, and if tomorrow isn't coming, then it doesn't matter that we didn't finish the project. 

So here we go!

Step 1: Take everything off of the bench.


Step 2: Take the bench pad outside and beat the dust out of it.

And then have a seat and dangle your feet for a little bit. Feel like a kid again. :o)


Step 3: Take everything out of the cubbies. The charcoal will be making it's way to it's new home in the shed and the bag of rice there is actually a bag of a whole lot of homemade rice compresses. A project I should finish and sell at the market.


Step 4: Get the Windex. Or Pledge. Probably not the vinegar spray though.

This is faux wood and vinegar is pretty harsh to it, so be careful and do a test spot if you aren't sure.

These are the upper cubbies. I plan on putting the tempera paints up here. Daughter LOVES to paint, and once she figures out how to open one of those bottle, Heeeoooweee! There'll be paint from this side to the other side of town.


My next step is to declutter all of the stuff I took out of the laundry room. I wasn't able to get to it in a timely manner, and I burned my poor little pointer (and mouse clicker) finger frying up french fries for dinner (that oil is HOT) So I'm going to rest it for the night and finish the job in the morning.

I can't wait to show you how beautiful the bench will look once I'm done! 

Until tomorrow!
With Love,
Emily

Plastic Roses!

Are you like me and LOVE those plastic bags you get from the grocery store? I use them for desposing kitty poo, dirty diapers, putting an on the go project, all kinds of things!

Well, they take up a lot of room don't they? I even have one of those pretty fabric tubes that supposed to hold them, but it just doesn't hold enough.

Well, I saw on youtube a long time ago, and forgive me because I can't seem to find the video again, on how to make what I like to call Plastic Roses.

Step 1: Start with a big bag full of plastic bags.


Step 2: Make a tube.

With two fingers on one hand, hold the handles. With the other hand, grasp at the handles and squeeze all of the air out of the bag. One fell swoop and your other hand should be at the opposite end of the bag.


Step 3: Wrap!

With two fingers at the bottom of the bag and two fingers through the handle end, wrap the bag around the two fingers at the bottom of the bag. If you've done it right the handles should be twisted like the picture.


Step 4: Wrap the wrap!

Taking the loop made with the handles, wrap it over and around the ball made around your fingers.


Step 5: Remove

Take your fingers out and you now have a plastic rose! Ready to be thrown into a diaper bag, or stored away for a later use.


Step 6: Repeat with the rest of the bags!

If you find that the handle loop is not tight enough, just twist it a few more times.


I added the above to my collection. I probably have about 75 in the bag. When I get too many bags for me to use, then I donate them to my local thrift store. They are always in need of bags!


Here I have my stash hanging up on the end of my bookcase in the laundry room. It's perfect for the quick grab when kitty has made a big stink in the cat box.


Go try it! I know you must have some bags begging for you to make them in to roses!

With Love,
Emily


Tuesday, April 10, 2012

All purpose vinegar spray

So my last post I shared with you how I make my own all purpose spray using nothing but thyme infused vinegar and water. Well, I would like to show you the POWER that spray packs!

Here's the recipe again!
**  Put some vinegar in a mason jar, added about a tablespoon or two of dried time and let it sit for about 2 weeks, stirring it once a day. You know it's done when the vinegar doesn't smell like vinegar anymore!

I then added half the jar, which I guess is about a cup full, to my spray bottle and filled the rest with tap water.**


Ok, here's my stove top. It's pretty nasty when I made a mess with dinner last night. Never leave a dish to come to a boil that has milk in it. As soon as you are out of reach it boils over and burns on your stove. Yea.

Yeah, this is pretty bad.


Step 1: Spray with vinegar spray and let it sit.

Why do any of the work? It's perfectly capable of working on it's own, so just let it be. In fact, this holds true with any all purpose cleaner you use. Just let it sit for a bit.


Step 2: Get your scraper!

I got this razor scraper at the local hardware store for a $1. I can replace the blades if I need too! 


Step 3: SCRRRRRRRAP!


I scraped and scraped and it all came up pretty easily. Oh so gross. But at least the spray smells good!


Step 5: Wipe!

I have to go back and do another application to were it burned on really good, but other than that I'm done. Took me about 5 minutes. Yea!!


Now go make some spray. You'll thank me and so will your budget!

With Love,
Emily