Showing posts with label Homemade. Show all posts

Saturday, April 13, 2013

Homemade Carpet Cleaner

I've lived in this house since the summer of 2009, and I have never washed the carpets. Needless to say I really need to shampoo them after having a baby and toddler grow up in this house and dropping/smearing any kind of liquid/gooey substance into the carpet,  and spot remover has been my best friend... until I couldn't afford to buy more.

So after going some time without carpet stain remover, (hey I homeschool now and I'm not actually interested in staring at the carpets), I decided that enough was enough. So I looked on pinterest and google and found many bloggers posting about dawn 'the-miracle-of-life' dish soap and hydrogen peroxide.

Really? It's like magic? MMmmm hmmm... sure.

Ok, I thought it a try, because as I said before, I can't really afford the actual store bought stuff anymore.

So the recipe I used is:
1 part dawn 
2 parts hydrogen peroxide

And the recipe for those who don't want to do mental math today:
1/2 cup of dawn
1 cup of hydrogen peroxide
(small batch)

Ok so here we go!

This is a test I literally did last night, so the pictures are kind of a funny color, but it's well worth the effort!

Spray on your concoction, use an old toothbrush (do I really have to tell you old? Not like you are going to want to use it in your mouth again..) and gently agitate the spot, wait few seconds (about the time needed to find the towel that thought you brought with you to the test) and then blot the spot!


As you can see, the spot in the lower part of the picture is GONE. Really, truly, GONE!


Yeah, I didn't think it would work either, given that it took less than a minute to clean a spot that's been there for at least a year. But it really does work, it really only took less than a minute, and now you can clean up some spots around your house too!

Word of advice: store the concoction in a dark place. Hydrogen peroxide needs to be kept in the dark (hence why it's in a brown bottle) because the Hydrogen is H2O2 will turn into H2O when exposed to too much sunlight. 

With Love,
Emily

Friday, April 13, 2012

How to make a butterfly feeder!

Hey everyone!

With ~~~~~?---->@ SPRING! @<----?~~~~~ being here we have TONS of butterflies. My daughter and I love to look at them as we wait at the bus stop, but the only thing is those butterflies are just too fast to get a real good close up look.

Well, I remember reading on eHow on how to make a butterfly feeder!


It's very simple really. Here's what I did.

Ingredients

Couple of hand fulls of sugar -about 2-3 tablespoons
Very hot water- about a cup
3 really old, this side of rotting bananas
Shallow dish of some kind- I used an old Tupperware kind of container that the lids never fit on anyway

Assemble

Step 1: Dissolve sugar in the hot water
Step 2: Cut bananas into around 2 inch chunks and place in dish
Step 3: Add sugar water, but make sure the bananas are up out of the water so the butterflies have something to land on!

Now I've heard that adding flowers around the feeder will help attract the butterflies, don't know if that works, but it does make it look pretty. Oh, and change out the bananas when they dry out or get moldy.

I placed my feeder outside of the front windows so my kids (and I) can watch from afar to not disturb the wildlife, but close enough to identify what butterflies we see.

If this works out for us, then we'll be doing this well into October/November, because we have a long butterfly season.


**Edit**
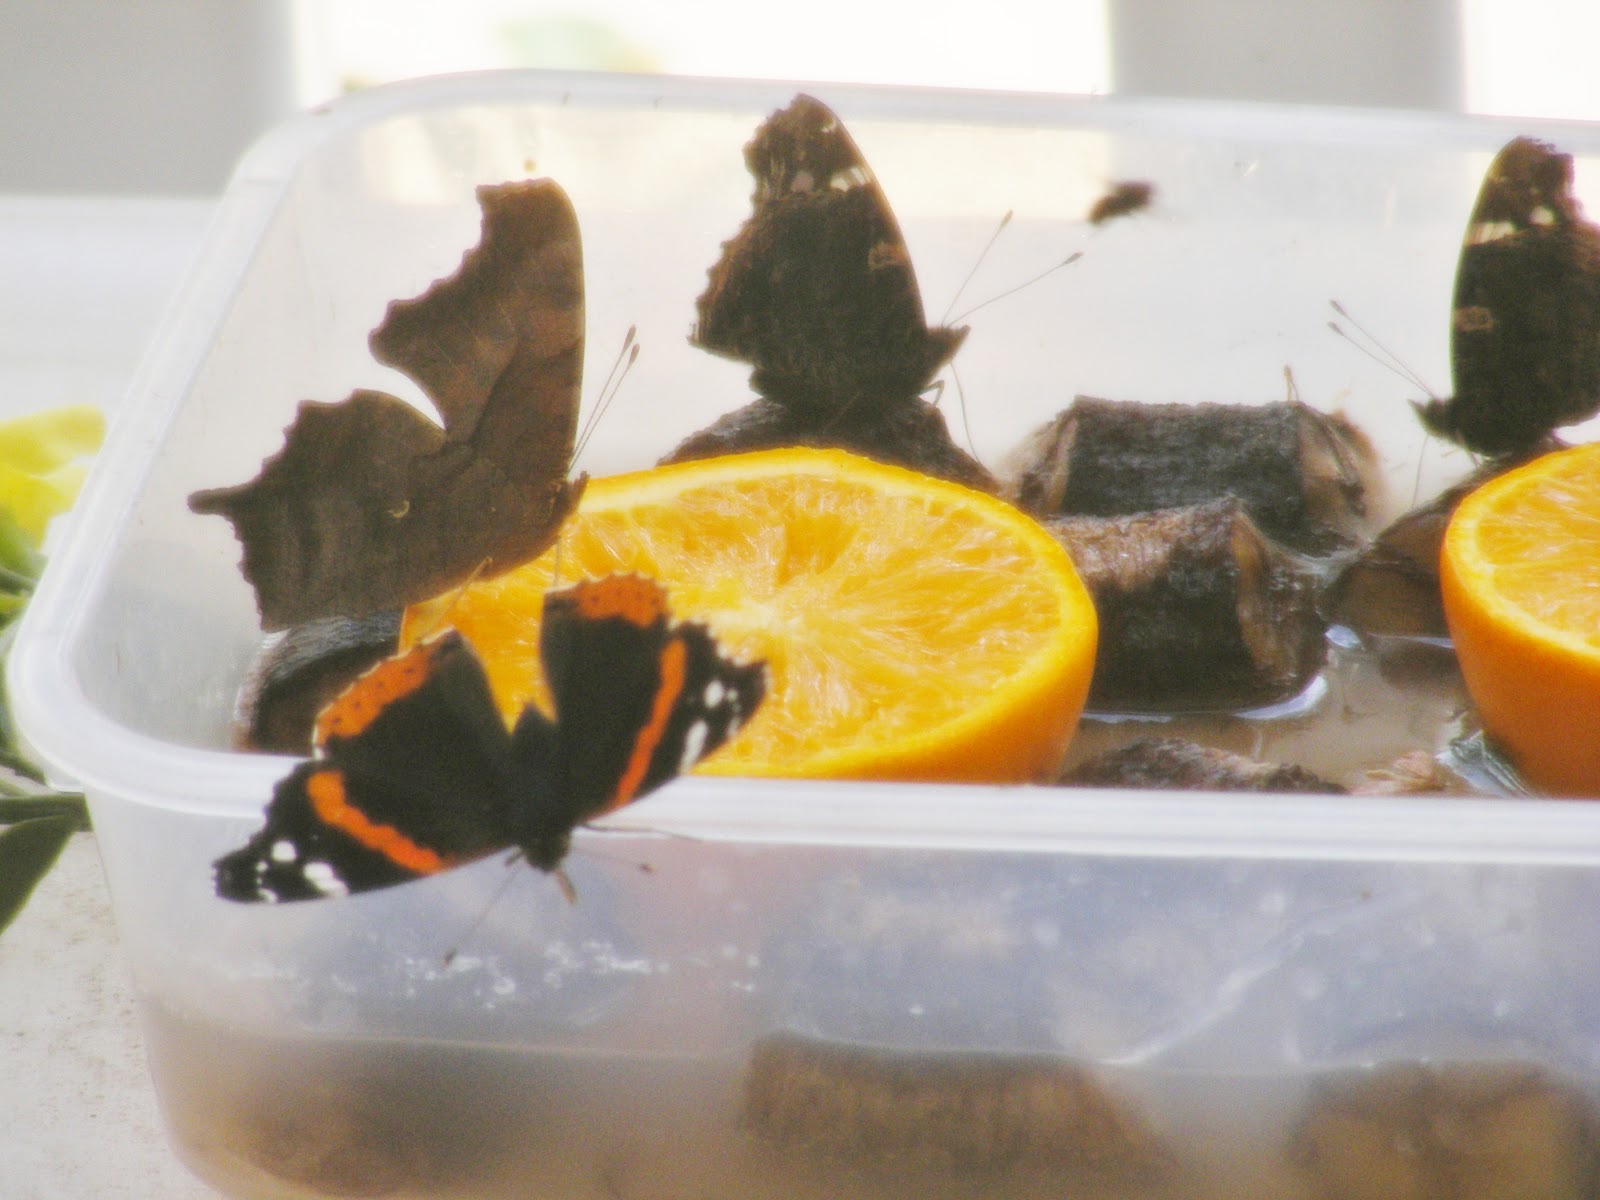
It took a little while for the butterflies to find mine, (I think it was because we had a petered out storm go through), but here they are!


I added an orange, poked at the fruit with a butter knife to loosen up the juices, and it seems to attract more and different kinds of butterflies.


LOVE IT!


I hope you make a butterfly feeder too!

Until next time!

With Love,
Emily

Thursday, April 12, 2012

How to Organize your Christmas Lights!

Hey everyone! While decluttering the stuff from the laundry room I found some Christmas lights that didn't make it back into the Christmas box. Well, I had been kicking myself for not finding this on The Chive sooner, but finding these MIA lights today means I get to try it out!


Step 1: Get a coat hanger.

I found that the kind with the notches in it is PERFECT for slipping the plug onto 
so it's easier to wrap the lights


Step 2: Wrap

I started at one end and worked my way across 
and then tucked in the end back through a previous wrap.


Step 3: Store

You can hang them up some place or put them nice and neat in the ol' Christmas box. You'll thank me this Christmas when you won't have to untangle those beautiful lights!


Have fun!

With Love,
Emily

Tuesday, April 10, 2012

All purpose vinegar spray

So my last post I shared with you how I make my own all purpose spray using nothing but thyme infused vinegar and water. Well, I would like to show you the POWER that spray packs!

Here's the recipe again!
**  Put some vinegar in a mason jar, added about a tablespoon or two of dried time and let it sit for about 2 weeks, stirring it once a day. You know it's done when the vinegar doesn't smell like vinegar anymore!

I then added half the jar, which I guess is about a cup full, to my spray bottle and filled the rest with tap water.**


Ok, here's my stove top. It's pretty nasty when I made a mess with dinner last night. Never leave a dish to come to a boil that has milk in it. As soon as you are out of reach it boils over and burns on your stove. Yea.

Yeah, this is pretty bad.


Step 1: Spray with vinegar spray and let it sit.

Why do any of the work? It's perfectly capable of working on it's own, so just let it be. In fact, this holds true with any all purpose cleaner you use. Just let it sit for a bit.


Step 2: Get your scraper!

I got this razor scraper at the local hardware store for a $1. I can replace the blades if I need too! 


Step 3: SCRRRRRRRAP!


I scraped and scraped and it all came up pretty easily. Oh so gross. But at least the spray smells good!


Step 5: Wipe!

I have to go back and do another application to were it burned on really good, but other than that I'm done. Took me about 5 minutes. Yea!!


Now go make some spray. You'll thank me and so will your budget!

With Love,
Emily