Tuesday, April 10, 2012

Project #2: The Kitchen Island

Welcome back to Project #2: The dreaded Kitchen Island. 


Now everyone has a place in their home where stuff collects everyday. For most people it's the dining room table, for me it's the kitchen island. It drives me freaking nuts, because I love to cook from scratch and I need all the room I can get. Shoot, the whole reason why we bought this house is because I fell in love with the kitchen and that HUGE island! So why do I let it get more and more cluttered? Million dollar question.
So here's what I did!

 Step one: Put any clean dishes and all foods away

I got out my blue plastic bowls and put the tomatoes, apples, and lemons in them. I put them there because one, I don't have enough room in the fridge for them. Two, tomatoes should be left out of the fridge anyway. And three, It looks pretty! And I'm more likely to use them if they are there where I can see them.


Step 2: Find a place for the mail to go

This is one of those mesh desktop organizing thingies. I nailed mine to the wall, because hey! why take up space on the counter? Now I won't lose that bill I need, or be searching for a pen anymore. It's also a good spot for the sunglasses too. Bonus!


Step 3: Wipe off the crumbs and admire how much room you've got again. Talk about counter space!


Step 4: Break out the spray!

Now I make my own, and have been for several months. I was using the "green" all purpose cleaner, but it was getting expensive, so I looked for an alternative. Turns out Vinegar and Water is all you really need!  Vinegar is a natural disinfectant.

 Now I got real tired of the smell of vinegar really quick, so I looked for other things I can do to make it smell better. Well, you can add a few drops of Lavender essential oil (which would be lovely, but I don't have any, nor the money to buy some) but I found two things that are really nice! Here at the Little Brick Ranch blog, she shows you how to infuse your vinegar with orange peels. 
You can use any kind of citrus peel. 

I, on the other hand, didn't have any citrus peels at the time, but I learned that Thyme is also a natural disinfectant. So I put some vinegar in a mason jar, added about a tablespoon or two of dried time and let it sit for about 2 weeks, stirring it once a day. You know it's done when the vinegar doesn't smell like vinegar anymore!

I then added half the jar, which I guess is about a cup full, to my spray bottle and filled the rest with tap water. MMMMmmmmm, smells so herby! Like I was just cooking!

Edit: I've gotten a huge response about my Thyme infused vinegar spray, and I just wanted to add this in...
Don't forget to strain the herbs out before you add it to your bottle!
But I'm sure you knew that already.
You're welcome. :o)


Step 5: Spray spray spray!!


One thing I love about my spray is that it lifts up and shows dirty spots I didn't see before. This one looks like a milk spot, and it'll just wipe away beautifully.


Step 6: Stand in awe. 

Great job! Now I can easily make meals for my family and not worry about not having enough elbow room.


How did your Kitchen Island/ or dining room table turn out? Did you find a home for everything? Don't forget to go through that mail and find a place for those bills. The wall is your canvas! 

Until next time!

With Love,
Emily

It's Tuesday already?

Hey everyone!

Sorry I didn't post yesterday like I promised, but I needed a day off from my weekend! It was SUPER busy!

How was your weekend? Relaxing? Fabulous? Just as crazy busy as mine?

I'll be posting later today with decluttering the Kitchen Island. I'm working on it at the moment and it's looking great!!

Stay tuned!

With Love,
Emily

Friday, April 6, 2012

Happy Easter!

Hey everyone! I just wanted to HOP on in and say Happy Easter!

I will busy this weekend with going to the market to sell my wares and, of course, Easter Sunday! Lots of eggs to hide for the kids!

I hope all of you have a safe, happy, and RELAXING weekend, and I will see you all bright and early on Monday with a new project.

The Kitchen Island.

Don't worry, we'll get back to the laundry room too. I don't know about you, but I keep going into my laundry room just to see how clean the floor is. Makes me smile that I accomplished something so great!

See you Monday!

With Love,
Emily

Thursday, April 5, 2012

Part 2 of Project #1- Declutter

Here we go! Declutter time!!

Step 1: Get ready with a couple of bags. 

One for trash and one for give away. You can do another one for items you want to sell, but in all honestly for me, I'll never find time to sell. It'll end up just sitting there cluttering my home. So I get rid of it, or find a home for it in the house.


Step 2: Categorize the contents

I found that tip from 

Top Five Organizing Mistakes - with Gayle Goddard, the Clutter Fairy

So that's what I did. And when you do that you suddenly have an easier way of seeing what you have and you can easily knock out a pile of like things, instead of switching tracks in you brain the whole time. 

So for me, I gave away all of the dolls except for two of them, because they are from my childhood and I want to give them to my kids. 

Out of this pile all I kept was the 2 dolls, the box of jewelry I made, the purple sketch pad and the green blanket.


Which I immediately found a use for! Looks better already, and we haven't even organized underneath yet!


Step 3: Repeat repeat repeat step 2 until you have got through all the boxes, bags and what not. 

Remember to not think too hard about what you are going through. It's just stuff. It feels good to have it, but keep in mind what you want your home to look like. When you put something in the keep pile, have an idea where it's home is going to be.  

So during this process of purging try really hard to give/throw away 2/3s or more than what you keep. Think of it as throwing away your past hurts and fear. When you give something away, think of it as putting a smile on someones face, making the world a little bit happier. 

******

You are becoming a stronger person with each discarded item. Can you just feel the light of healing beaming on you? It's like stepping out in the warm sunshine after sitting in a really cold building. Gives me warm fuzzies.

******

Oh, and since I took everything off of the laundry room floor, I went ahead and put the 4 bags of canned goods that I had on the floor away.

Looks pretty doesn't it?


There you have it! Now don't worry if you can't put away everything that's in your keep pile right away. We're going to go through the keep pile later when we are putting the stuff in their homes and we are going to try to pair down, give/throw away again. Trust me, you will thank me later. Just put what you want to keep in a box and set aside. 

Until the next project, take care!

With Love,
Emily

Project #1 The mud room floor.

Now I don't know about you, but I LOVE LOVE LOVE! seeing before and after pictures. As much as I hate for anyone to see my clutter, I'm sharing because I want you to see you are not alone! 

I also believe in doing projects and not whole rooms. I get overwhelmed! Seeing the whole room as a total and thinking "I have to clean the whole thing... By. My. Self." quickly sucks any motivation I had when I walked into the room. My hubby cleared that up for me one day by suggesting I do projects! (duh! Why didn't I think of that!?). 

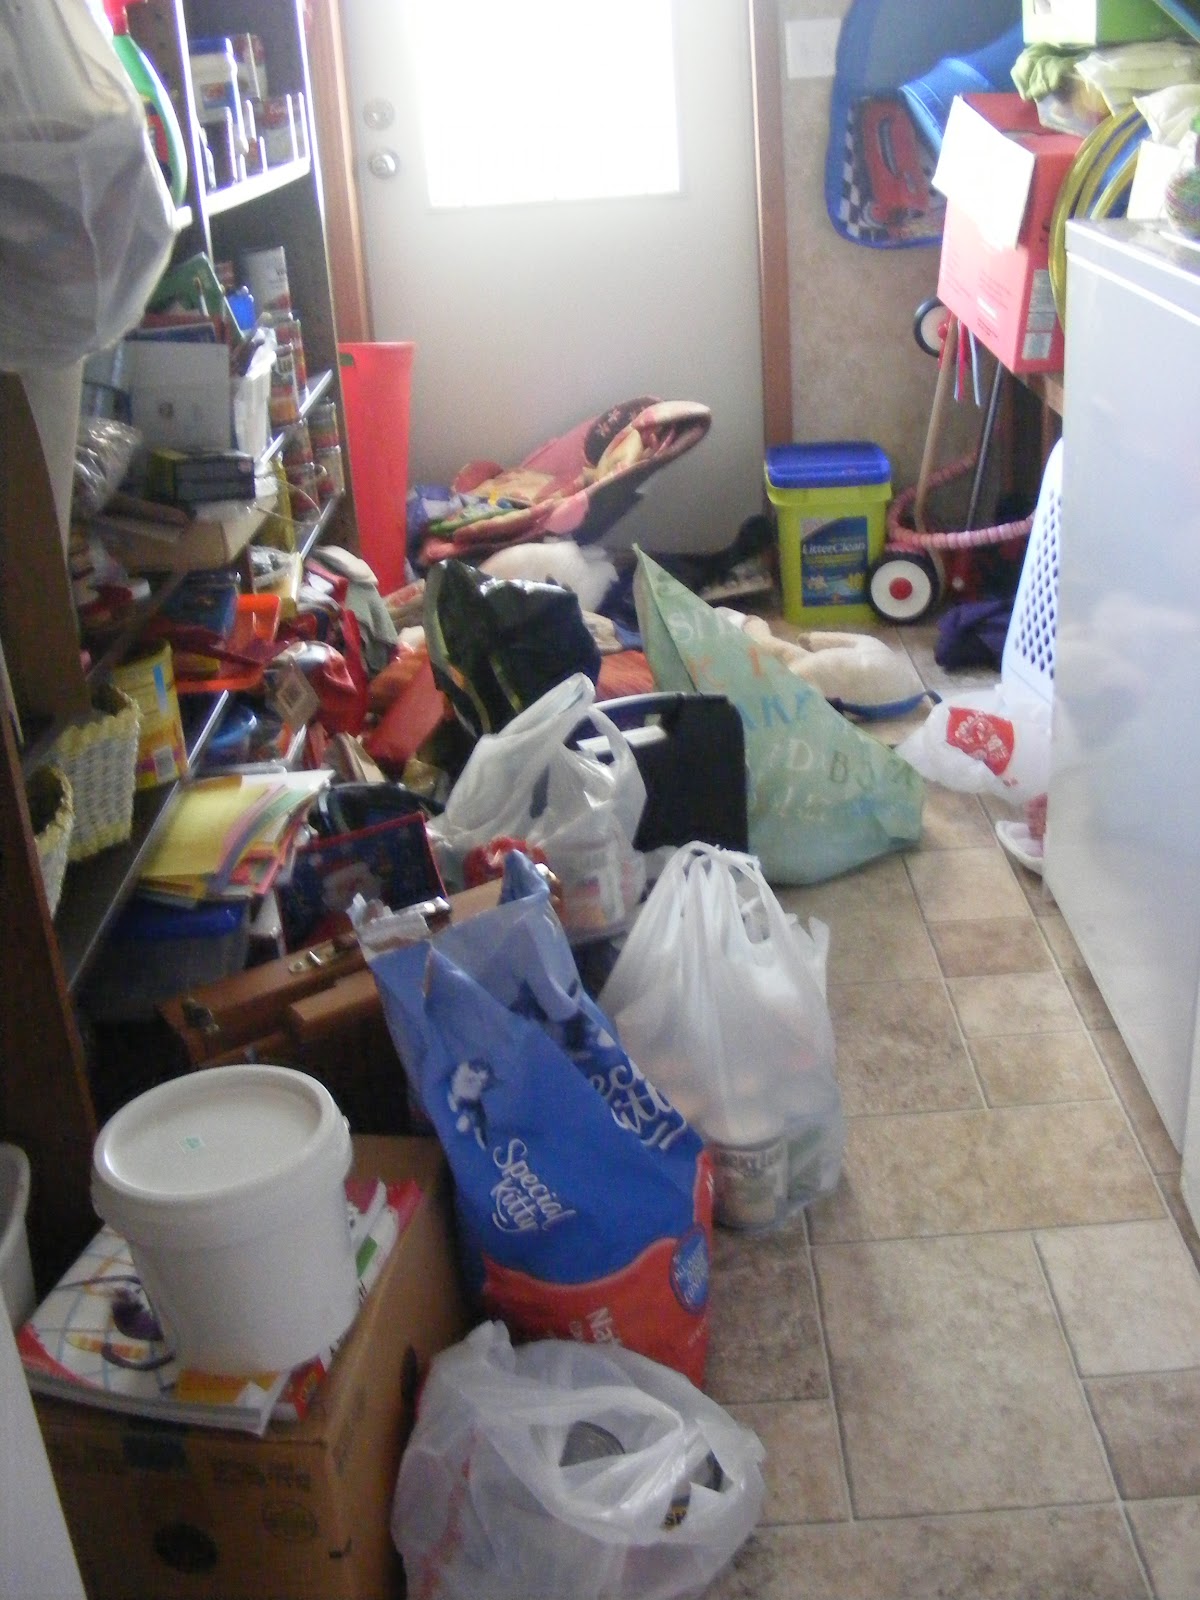
So here is my first project. The laundry room. (I know, didn't she just say not the whole room?) Yes, I did, and I mean it. My laundry room actually has several projects to do.

The Floor


The shelves. Crafts and canned goods.


The washer and dryer.


And the bench. Yes, there is a bench there!

Today I'm starting with the laundry room floor. Can't do anything else until I can walk through the room! The stuff on the floor has been sitting there for about a year. Clutter always starts off small like a little bitty baby, and it grows and grows without you even realizing it, until one day it's a big fat elephant sitting there!

***************

Step 1: Remove large items. 

I removed all the big boxes and threw out the cardboard.

Step 2: Bag up loose items and take everything out off of the floor.


Step 3: Discover cubbie holes in bench!

Told you I had a bench! We're going to clear out the cubbies when we clear off the bench area. But that's a project for later.


I wanted to show you, I haven't actually decluttered a darn thing yet. All I've done thus far is move everything to the table and threw out cardboard and obvious garbage. We're gonna declutter this in a little bit. :o)


Step 4: Get the mop... and the broom.

I love my shark steamer. I try to use the least amount of chemicals in my house as far as cleaning goes. Mostly because my daughter has eczema from birth and we didn't know what was triggering it. So the chemicals went out first. AAAnnnd, I'm Fricken Frugal. The Shark uses just water and steams your floors clean!
(oh and if you have hard water like me, PLEASE use distilled water, not tap. The minerals in the tap water will ruin your equipment quicker than a flea jumping up to bite you in the knee.)


Step 5: Admire

Be in awe! You've done a great job! Get some socks on and slide across your floor. It looks beautiful!

My family is now safer because the exit to the outside world is free and clear. I can easily do laundry and I have all the access I need to the canned goods and the crafts. It took me about 30 minutes to remove and clean everything.


How have you done? Did you get your laundry room floor clean too? I would love to see your before and after pictures! Share your success! You are one step closer to being free.

And now, time to go through the boxes. Stay tuned!

With Love,
Emily

Hiya and Welcome!

As my very first posting, I want to welcome all who were curious enough to take the chance and click. So, how do you do?

This blog is not just another blog about organizing and cleaning your home, but is also intended to support and encourage those who were abused as children and are now trying to "dig" their way to freedom and final healing by breaking down their wall of protection, i.e. the CLUTTER.

Now, I'm not a therapist in anyway shape, form, or legal training, but I am someone who really gets it, because I have been there myself. I know the guilt, frustration, and all that negativity that comes from being abused. But I also know the feeling of being healed, and the freedom it gives me to know that my past is past and my future is bright.

I am battling my last fight right now with my past and that is my clutter that I have used to "protect" myself from the boogieman of my abuser. I remember I was watching a wonderful show about hoarders, (always induces cleaning mode in me), and one lady they were helping explained how her hoarding started. She had been molested as a child and she would keep her room messy in hopes that the person would step on a toy and wake her up. This in turn, in her mind, would prevent the molesting from happening.

As soon as I heard that I just about jumped up and down screaming, "That's me! That's me!". I too had been molested as a child and started leaving my room messy in hopes of stopping the person from doing it. It didn't work, but throughout my life, even though the boogieman was gone and was never going to come back, I still would leave my room very messy. It was a wall that I was building around me to "protect" me from being hurt again, and it was comforting in a way.

Now, it's been about 20 years since I was abused, and it doesn't bother me to think, or even talk about it, but I still have 20 years of clutter to deal with. I know it's a mental state. I know that I'm not going to get hurt again. In reality, by having this clutter I am in fact endangering myself and my family, and pushing away friends from visiting my home. My vision of my home and what I see now are two different things, and I want to share my experience with you of my journey towards that vision!

I will share the many tips and tricks that I have learned/ am leaning and will link you to them as I go as I find them, and I apologize in advance if I share a tip and not a link, it's because I don't remember where I learned it!

So thank you for reading such a long post. You get 10 brownie points for making it to the end!

Let's get started!!